Padlet: Collaborative Boards For Teaching and Learning
Padlet is a digital bulletin boar that makes it easy for students to share ideas, resources, and reflections. This article will explore how Padlet can enhance participation and engagement across disciplines with a range of customizable formats and simple integration into Moodle.
In this article
- Is Padlet Right For You?
- Padlet Features and Details
- Boards and Sandboxes: What’s the Difference?
- Using Padlet In Moodle
- Best Practices
- Use Cases and Examples
- Resources
Is Padlet Right For You?
Padlet is a versatile platform ideal for collecting and displaying student contributions in a visually engaging, collaborative space. It supports active learning by allowing students to post text, images, videos, links, and audio, all in real time or asynchronously.
You might consider using Padlet if you want to:
- Encourage student engagement through interactive brainstorming, discussion boards, or exit tickets
- Visualize ideas and connections using maps, timelines, or flowcharts
- Create opportunities for peer-to-peer feedback or content curation
- Support group collaboration with flexible formats and sharing options
- Incorporate multimedia responses into formative assessment or reflection activities
Padlet works well across a range of teaching modalities, from in-person to fully online, and is especially useful for courses that prioritize student voice, participation, and community-building.
Padlet Features and Details
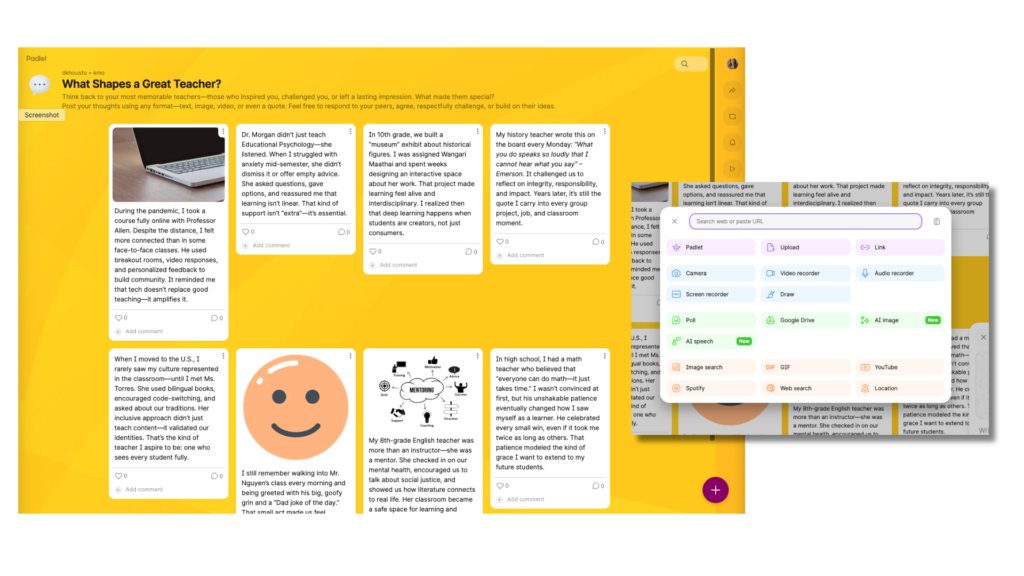
Padlet is a flexible digital canvas where you and your students can post and interact with content in a variety of formats. Each Padlet is a type of board, a shared space where users can contribute text, images, links, audio, video, or drawings. You can think of Padlets as dynamic, customizable bulletin boards that can be arranged in formats like grids, timelines, maps, or freeform layouts to match your activity design.
Key Features That Support Engagement
Padlet includes built-in tools to foster interactivity and community:
- Reactions: Let students “like,” rate, or vote on posts.
- Comments: Allow users to respond to one another directly.
- Custom Post Fields: Create templates with placeholders to guide student responses (e.g., title and description prompts).
- Real-Time Collaboration: Watch posts populate live—great for in-class activities or remote engagement.
- AI-Powered Moderation: Choose from no moderation, automatic moderation, or manual approval of posts.
Visual Customization and Privacy Options
Instructors can brand or personalize Padlets with:
- Custom titles, icons, and wallpapers
- Light or dark mode, font options, and post sizing
- Permissions ranging from private to public, with fine-tuned visitor roles (reader, commenter, writer)
Learn all about Padlet customization features within your board or sandbox settings.
Boards and Sandboxes: What’s the Difference?
A Padlet Board is a shared digital space where all participants can post, comment, or collaborate in real time. Padlet boards work entirely through posts, aside from the title and brief description, all collaboration or work is done by adding posts. Both students and instructors interact with the board in this way. While posts can be arranged in various layouts depending on the chosen format, there are relatively few features outside of posting itself.
Boards offer unique Padlet capabilities such as customizable layouts and settings, embedded media, and interactive reactions like likes or stars to support collaboration, planning, and other activities. Attachments make it possible to include a variety of resources and media within posts, such as links, videos, text, and other digital content, creating a versatile space for sharing and interaction.
A Padlet Sandbox functions like a digital whiteboard, providing an open canvas where participants can place, move, and connect notes, images, drawings, and other media. Similar to how Google Jamboard once worked, a sandbox can contain multiple boards, giving students the option to work individually on their own boards or collaborate together on a single shared board. In either case, all activity within the sandbox is visible to everyone who has access, allowing for transparency and shared awareness.
This flexible, non-linear space is ideal for brainstorming, mind mapping, or visually organizing ideas, though the open format can make it challenging to maintain structure as contributions grow. This tool, like boards, also allows instructors and students to add attachments. Although unlike boards attachments, shapes, text, and other integrations can be added to a sandbox without the requirement of a formal “post”.
Padlet currently meets A-level accessibility standards, but not the AA standard, which is an upcoming requirement for educational tools under the WCAG guidelines. This means some features, especially the highly visual Sandbox format may still create barriers for students using assistive technologies, so it’s important to plan alternatives if you plan to use this tool. See Padlet’s Accessibility page for details.

Advanced Use: The Padlet of Padlets
Need to organize multiple boards? Create a “Padlet of Padlets” which links out to other Padlet boards, acting as a homepage or dashboard for your course. We call this a Central Wall.
Central Walls can also be used as a work around for sandboxes. Share templates with students to use on their individual boards, then allow them to access the central board to comment or interact with other students work.
Instructors can customize the cover image of Padlets displayed within the central wall. This customization makes for clear direction as well as improvement to the look and feel of the community board. Watch Padlet’s “Link to Another Padlet” Video (0:18) to learn how this is done.

Using Padlet In Moodle
To take full advantage of NC State’s institutional license, instructors must first create a Padlet activity inside a Moodle course. This initial connection ensures that your Padlet account is authenticated through the university’s system, granting access to all premium features, including the ability to create unlimited boards, use advanced privacy settings, and manage student participation effectively.
After this first connection, instructors can continue to use Padlet within Moodle or independently. Boards can be embedded in course pages, shared through links, or posted using QR codes. Embedding Padlet as a Moodle activity makes it easy for students to interact without navigating away from the LMS and helps streamline participation.
Setting up Padlet in Moodle is simple:
- Turn on edit mode in your course.
- Select Add an activity or resource, then choose Padlet.
- Click Select content and either create a new Padlet or choose an existing one.
- Click Save and Return to Course.
This workflow not only integrates Padlet smoothly into your course but also ensures students can engage with minimal friction and without needing to register for separate accounts. For more information about connecting Padlet to Moodle check out our knowledge base article on Getting Started With Padlet In Moodle.
Student Access and Permissions
Once a Padlet is assigned in Moodle, students can access it seamlessly. Either directly from the Moodle course or by logging into Padlet with their NC State credentials. In either case, their identity is preserved and, when grade pass back is enabled, their participation will be correctly recorded in Moodle.
Students are not required to create a separate Padlet account. As long as the board was assigned via Moodle, their contributions remain associated with their identity even if they return to Padlet outside the LMS. This reduces barriers to participation while maintaining accurate tracking for instructors.
Students can post content, respond to prompts, and if enabled, comment or react to peers’ posts. However, instructors retain control over most editing functions, and settings determine whether students can do various things like delete or download content.
Roles & Capabilities: Instructors vs. Students
| Action | Instructor | Student |
| Create new Padlets | ✅ Yes | 🚫 No |
| Post to a Padlet | ✅ Yes | ✅ Yes |
| Comment on posts (if enabled) | ✅ Yes | ✅ Yes |
| React (like, star, vote) to posts (if enabled) | ✅ Yes | ✅ Yes |
| Delete others’ posts | ✅ Yes | 🚫 No |
| Edit others’ posts | ✅ Yes | 🚫 No |
| Export Padlet content | ✅ Yes | 🚫 Only if allowed |
| Access Padlet from any device | ✅ Yes | ✅ Yes |
| View identity of contributors | ✅ Yes | 🚫 No (unless shown) |
Best Practices
Padlet’s flexibility makes it a powerful tool for a variety of creative and meaningful instructional uses. Whether you’re aiming for low-stakes engagement or deeper collaboration, planning with intention will help you get the most out of the platform.
Design with Purpose
Before creating a Padlet board, consider what kind of interaction you want to foster. Is the goal reflection, resource sharing, peer feedback, or brainstorming? Choosing the right Padlet format is key:
- Grid or Wall for organizing discrete posts such as gallery walks or curated collections.
- Stream or Timeline for chronological discussion and journaling.
- Map or Canvas for spatial or conceptual exploration.
Structure the Interaction
Provide clear prompts and expectations directly in the Padlet or your course. A well-structured activity helps students understand not just what to post but why it matters. You can also:
- Use post placeholders (e.g., “Title your post with your topic”).
- Set required fields or post templates for consistency.
- Share a short demo or screenshot guide to model the process.
Make Engagement Visible
Padlet offers features like reactions (stars, votes, likes) and comments that can deepen participation and peer-to-peer interaction. Instructors can also highlight or pin posts that represent strong examples, common challenges, or key discussion points. Take advantage of these features to encourage student engagement, and humanize the experience further.
Model and Moderate
Padlet works best when instructors are visible participants. Post alongside students to model tone, format, and expectations. For larger classes or sensitive topics, use comment moderation or manual approval to keep the environment supportive and safe.
Accessibility and Alternatives
Since not every student engages with technology in the same way, accessibility should guide design choices. Keep color contrast and text readability in mind, provide captions or transcripts for audio/video posts, and ensure students understand how to navigate the tool. If using Padlet in sandbox-style activities, always prepare an alternative assignment option to ensure all learners can participate equitably.
Reuse and Reflect
Finally, think of Padlet as more than a one-off tool. Consider creating a “Padlet of Padlets” as a homepage for student resources, semester-long journals, or curated examples. Boards can be duplicated each term, helping you build a library of models while showing students the evolution of learning communities over time.
Use Cases and Examples
Collaborative Peer Feedback in a Visual Design Course
In a graphic communications class, the instructor used the Grid format to create a “Student Showcase” Padlet where learners uploaded drafts of their infographic projects. Each post included an image and a brief design rationale. Classmates used star ratings and comments to provide targeted feedback. The instructor highlighted exemplary submissions to foster discussion and model critique strategies. At the end of the week, students were asked to revise their designs based on the Padlet interactions, integrating peer input into their final versions.

While this example shows students giving feedback on infographic drafts, a Grid Format with image, text, and rating features can work for many disciplines:
- STEM fields: Students could post lab diagrams, prototypes, or data visualizations for peer critique.
- Language learning: Learners upload writing samples or recorded dialogues for language feedback.
- Performing arts: Actors, musicians, or dancers share short performance clips for structured peer review.
- Portfolio building: Students post excerpts from major projects over the semester, receiving iterative feedback.
Graded vs. Non-Graded Options
This activity works well in both assessment formats:
- Graded: Assign points for completion (e.g., posting draft + giving 3+ peer feedback comments) or for quality. This will need to be shared through Moodle to ensure grade pass back.
- Non-Graded: Use it as low-stakes practice to build a feedback culture. Without grades, students may feel freer to experiment and take creative risks.
Instructors often start with non-graded boards early in the semester to model good feedback, then shift to graded boards once students are comfortable with the process.
Key Settings to Enable When Creating This Padlet
When building a collaborative feedback board like this, consider:
- Format: Grid view to make visual comparisons easy.
- Posting: Require both a title and description so posts are complete and easy to reference.
- Comments: Enabled for peer-to-peer discussion.
- Reactions: Star ratings (or likes) enabled for quick quantitative feedback.
- Attribution: Names visible for accountability.
- Moderation (Optional): you can approve posts before they go live if you want to model examples first.
- Sorting: Posts can be left in upload order or sorted by most recent for live critique sessions.
Reflective Journaling in a Humanities Seminar
In a fully asynchronous ethics course, students engaged in ongoing reflection using the Grid format. Each week, the instructor posted a thematic question, such as “How does this week’s reading change your understanding of responsibility?” and students responded with text, video, or voice recordings. The Grid format allowed posts from each week to appear in clearly defined sections, making it easy to scan and compare responses. Built-in timestamps gave students and the instructor a visual record of when each reflection was posted, helping track participation and showing the chronological development of ideas over the semester. Over time, the board became a living archive of thought, where students could revisit earlier entries, identify shifts in their perspectives, and comment on each other’s posts to draw interdisciplinary connections.

A Grid-style Padlet with weekly sections and visible timestamps is well-suited for:
- STEM lab journals: Students document experiments with dates and progress notes.
- Creative process logs: Artists or writers share works-in-progress over time.
- Language learning diaries: Learners track vocabulary growth and fluency milestones.
- Field observations: Students upload photos, notes, and audio clips from site visits with date-stamped context.
Graded vs. Non-Graded Options
- Graded: Award points for timely submissions, depth of reflection, and engagement with peers. The timestamps can help verify on-time posting for weekly deadlines.
- Non-Graded: Use as an ongoing personal learning journal, encouraging honest self-reflection without grade pressure.
Some instructors combine the two approaches: grading for on-time completion (using timestamps) while keeping comments and tone informal to encourage openness. When grading instructors can see every post each student has made all grouped together, which may make an activity like this easy to grade and manage.
Key Settings to Enable When Creating This Padlet
- Format: Grid to organize responses into weekly sections for quick scanning.
- Posting: Allow text, audio, or video so students can choose their preferred reflection style.
- Comments: Enabled for peer dialogue.
- Reactions: Enabled to acknowledge connections or appreciation without requiring a full comment.
- Attribution: Names visible for accountability.
- Timestamps: Keep visible to monitor pacing and ensure participation is spread across the semester, not rushed at the end.
Video-Based Introductions in an Online Course
For an introductory activity in Introduction to Online Learning Design, the instructor used Padlet as a flexible alternative to Flipgrid. A Grid-format Padlet was created where each post represented a student introduction, with the post title field repurposed as the student’s name and the body field hidden so contributions were video-only. Students recorded short videos introducing themselves by sharing their name, location, hobbies, work or school experience, and what they were excited to learn in the class. The attachments setting was restricted to video and audio, ensuring a streamlined gallery of introductions that was easy for peers to browse.

A Grid-style Padlet with Video and Audio attachments enabled are well-suited for:
- Weekly video check-ins where students share progress or questions.
- Language learning practice, recording short speaking exercises for feedback.
- Mini-presentations in asynchronous courses.
- Peer interviews where students upload recorded conversations.
Graded vs. Non-Graded Options
- Graded: Assign participation points for posting an introduction and responding to peers by a set deadline. Timestamps make it easy to verify on-time contributions.
- Non-Graded: Keep it as an icebreaker without assessment pressure, focusing on building comfort with video-based interaction.
Some instructors start non-graded for introductions, then use the same format later in the course for graded reflective responses or presentations.
Key Settings to Enable When Creating This Padlet
- Format: Grid for easy viewing and organization of video thumbnails.
- Posting: Title field renamed to “Name” or “Subject.” Body field hidden.
- Attachments: Restricted to video and audio only.
- Comments: Enabled for peer-to-peer replies (video, audio, or text).
- Reactions: Emoji enabled to encourage quick, supportive engagement.
- Attribution: Names visible for accountability.
- Timestamps: Keep visible to confirm timely submissions.
Resource Curation and Group Research in a STEM Class
For a collaborative literature review project in an upper-level environmental science course, student teams used the Columns format in Padlet to collect, organize, and annotate scholarly sources. Each column represented a sub-topic such as Air Quality, Carbon Capture, or Public Policy and students posted links, PDFs, and short summaries. Visible timestamps made it easy for the instructor to track when new resources were added, helping to monitor progress across the semester and identify which groups were contributing consistently. The chronological order within each column also allowed peers to see the most recent additions first, making it simple to spot fresh material to review and comment on. This format created a dynamic, community-vetted library of research materials that evolved over time.

A Columns-style Padlet with visible timestamps is ideal for:
- Organizing case studies by theme, location, or method.
- Building a class reading archive for ongoing reference.
- Collecting multimedia resources (articles, videos, datasets) for project-based learning.
- Tracking collaborative project inputs where order of contributions matters (e.g., sequential lab work).
Graded vs. Non-Graded Options
- Graded: Assign points for a minimum number of quality contributions and for providing peer feedback. Timestamps help verify on-time submissions and even distribution of work over time.
- Non-Graded: Use as an open, evolving resource bank without deadlines. Which is great for research-heavy courses or cross-class collaborations.
Some instructors grade the initial contributions to establish quality standards, then keep the board open for ongoing, non-graded additions as students encounter new material.
Key Settings to Enable When Creating This Padlet
- Format: Columns for topic-based organization.
- Posting: Require title + link or file + short summary for consistency.
- Comments: Enabled for feedback on credibility and relevance.
- Reactions (Optional): Likes or upvotes can highlight most useful sources.
- Attribution: Names visible for accountability.
- Timestamps: Keep visible to track submission timing and encourage steady contributions.
- Moderation: Useful if you want to approve sources before they appear publicly.
Interactive Exit Tickets in an Introductory Lecture
At the end of each class, a biology instructor displayed a Padlet on the projector using the Stream format and posed an open-ended prompt, such as “What’s one concept you’re still unsure about?” or “What analogy helped something click today?.” Students posted short, anonymous responses in real time from their devices. Because the Stream format lists posts in chronological order, timestamps made it easy to see exactly when each response came in, allowing the instructor to gauge how quickly students engaged and spot clusters of similar questions as they appeared. This real-time visibility helped the instructor adjust pacing, revisit tricky topics immediately, or plan targeted review for the next session.

A Stream-style Padlet with visible timestamps works well for:
- Mid-class comprehension checks to see if students are ready to move forward.
- Quick polls or warm-up prompts at the start of a lesson.
- Brainstorming sessions where ideas need to be captured in the order they emerge.
- Event feedback walls to collect reactions during conferences, workshops, or guest lectures.
Graded vs. Non-Graded Options
- Graded: Assign participation points for contributing an exit ticket each class, with timestamps verifying attendance and timeliness.
- Non-Graded: Keep it anonymous and low-stakes to encourage honest responses without fear of judgment. Even though student cannot see who has posted in an anonymous Padlet, instructors can within the gradebook.
Many instructors opt for non-graded during the semester to build trust, then occasionally assign a graded exit ticket to ensure consistent engagement.
Key Settings to Enable When Creating This Padlet
- Format: Stream for vertical scrolling and immediate visibility of new posts.
- Posting: Short text posts, no title required.
- Comments: Off for speed, or on if you want peer-to-peer follow-up.
- Reactions: Emoji enabled so students can “upvote” questions they share.
- Attribution (Optional): Turn off for anonymity, or on for accountability.
- Timestamps: Visible to track participation patterns and identify when certain types of questions arise.
- Moderation: Off during live use to keep the discussion flowing without delay.
Workshop Information
Padlet: Getting Started
- Register for a workshop
- Watch a recorded workshop (Coming Soon!)
If there are no available workshops, please feel free to request an instructional consultation about this topic.
Resources
- Padlet Instructional Tools Page – DELTA Website
- Padlet Knowledge Base Articles – DELTA LearnTech Help Desk
- Padlet Sessions and Recordings – Padlet Help
- Padlet Features – Padlet Help Articles
- Padlet Video Tutorials – Padlet YouTube
- Padlet Education Templates
- Padlet Accessibility Page
- Padlet Blog